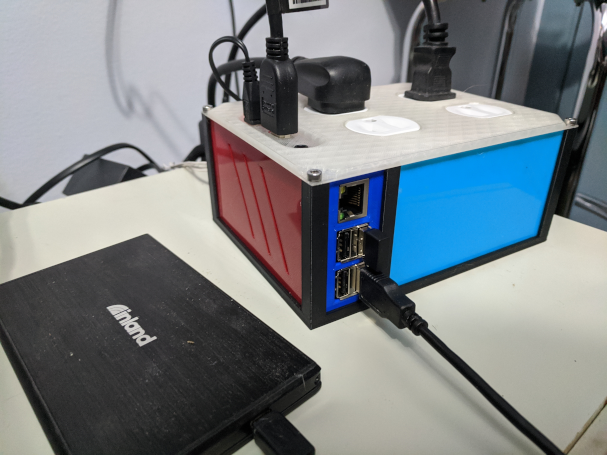
Designing and Printing a Raspberry Pi Case
Four Years
For most of it’s life, my Raspberry Pi 3B+ didn’t have a nice case like the above, but instead it trudged through its existance as this mess:
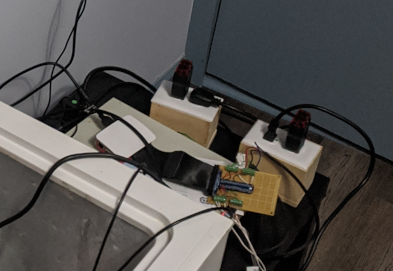
I had good intentions.
I bought the RPi as an experiment, to control and log fermentation temperatures for my beer brewing setup. I had planned, after getting things setup and stable, to build a nice enclosure or to buy a ‘project box’ to mount it in so at least it wouldn’t look horrible.
It turns out that using something for a critical function means that it is difficult to make changes to it. Or, at least, that’s my excuse.
The Requirements
One of the reasons that I hadn’t gotten around to making a case is that it’s actually fairly complex. I needed to pack together:
- A Rapsberry Pi 3B
- USB ports exposed/available (1 side)
- Power & HDMI ports exposed/available (another side)
- GPIO header given enough room to attach a ribbon cable or jumpers (yet another side or space)
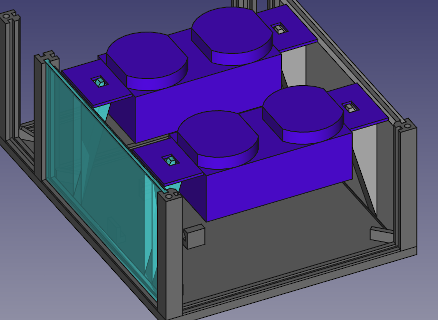
- 2 standard 120V AC 15 Amp outlets
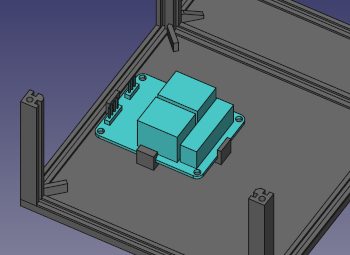
- Relay modules (either 2 x 1 relay modules, or a single 2 relay module)
- 2 Ports/Holes for wires
- 2 temperature sensors
- 1-2 120V AC cord
On top of that, I wanted to keep the DC (Raspberry Pi and associated wiring) as isolated as possible from the AC (electrical outlets).
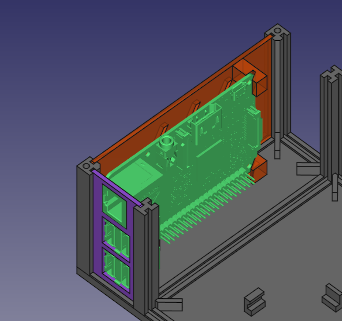
And, in addition the space requirements, the Raspberry Pi had to have two of it’s edges along two edges of the case (for port access) and space around a third for the GPIO header. I found this to be one of the determining factors of designing a case.
Software
I ended up designing it all in FreeCad.
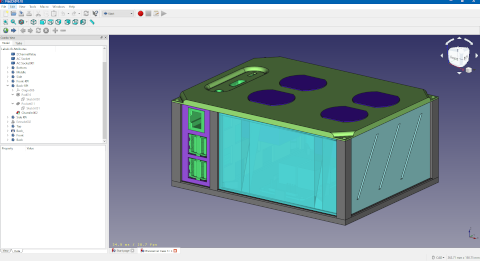
FreeCad is a Parametric modeler, which works well for me since I can use measurements to create the models. It’s also free and open source.
3D Printing Considerations
I decided early on, based on my early experience with 3D printing, that I wanted to make the case modular.
This is so that:
- I could make different parts of the case out of different filaments and it would look cool.
- Different parts of the case could be reprinted and replace independently if needed (upgrading to a different RPi would only require reprinting part of the case, in theory).
- This would make printing easier, since smaller individual parts could be simpler to print.
- Most importantly, an error in design wouldn’t require reprinting the entire case saving time and filament.
Lessons Learned
Model the hardware/objects you are building for.
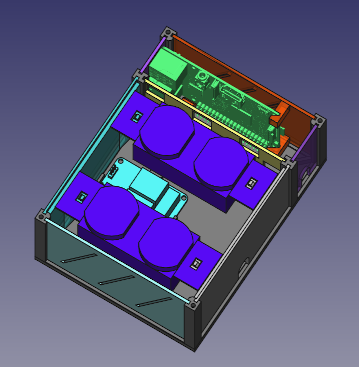
I quickly realized that having a model of the RPi, relay module and AC outlets would be much easier than trying to refer to measurements and trying to verify things would fit.
Note: I found an insanely detailed and accurate model of an RPi 3B.
You don’t have to model every detail, just the features that matter to the design, like the thickness of the board and it’s width/height.
3D printing can achieve suprising dimensional accuracy.
I set out to create a case that required as few screws as possible and I ended up only needing 4 M3 screws. Everything else just fits together:
- The sides slide into slots printed into the pillars/bottom.
- The Raspberry Pi is held in place by brackets built into the side, the front plate (USB ports) and the top (power / HDMI ports).
- The power outlets sit on a ledge on both the front and back and are held in place by the top.
- The relay module is held in place by brackets built into the bottom
Allow space between parts.
Even though the printer can achieve some amazing accuracy, physical parts still require some space to fit together properly. The sides are about 0.2 mm shorter that the length of the slots they fit into, and chambfered on the corners. I found that with my printer, a modified Ender 3 Pro, this produce a pefect fit.
Design parts so that the most detail is printed in the X/Y plane
The printer achieves the best accuracy in the X & Y dimensions. For my printer, this is well within the tolerance of my digital calipers, ~0.05mm. Even in a ‘high detail’ profile, each layer the printer makes will be ~0.12mm thick, so details less than that don’t come out as well when printed along the Z axis.