Flashing Firmware to an Ender 3 Pro with a Raspberry Pi
One of the last ‘free’ upgrades to my 3D printer that I hadn’t done yet was updating the firmware to the latest version of Marlin.
Updating the firmware not only brings new features, but it also means I can use the ‘vanilla’ version of the software and not the Creality version. I can always have the newest version and control over settings and details!
The Board and Processor
Unfortunately, updating the firmware to use a custom compiled version of Marlin isn’t as easy as just putting the firmware file on the SD card and turning the printer on.
Even though Creality began shipping new Ender 3 Pros with a newer board around July, when I bought mine, my printer was from the earlier batch. I have the 1.1.4 board, not the new 4.2.x verion.
Oh, well. From what I’ve read the 4.2.x version would have made things easier, but it’s not impossible on the older board.
Bootloader
The 4.2.x boards would be easier because you can flash the firmware over USB, without any modifiacation.
The 1.1.4 can also be updated in this way, but only after flashing a bootloader to the board. This can not be done over USB, but instead requires connecting to pins on the board.
There are tons of tutorials on how to do this with an Arduino device or a USBSPI adapter. But, since I have 2 Raspberry Pis, I really didn’t want to spend another $30 on a device that would be used once (once the bootloader is flashed, it never has to be done again).
So, after some searching, I figured out it is possible to flash the bootloader with a Raspberry Pi, but most of the tutorials were either incomplete (lots of ‘use the appropriate value for your printer here’) or just plain wrong.
Here’s what I ended up doing:
avrdude setup on the Raspberry Pi
- Install avrdude:
sudo apt install avrdude - Copy the default config to my home directory:
cp /etc/avrdude.conf ~/avrdude_gpio.conf - Edit the new file:
emacs ~/avrdude_gpio.conf - Change the baudrate for the ‘linuxspi’ section to 115200
- Find the linuxspi section: press ctrl-s -> type ‘linuxspi’ -> hit enter
- Change the baudrate value:
programmer
  id = "linuxspi";
  desc = "Use Linux SPI device in /dev/spidev*";
  type = "linuxspi";
  reset = 25;
  baudrate = 115200;
- Add a new config at the bottom of the file. This will allow use of the GPIO pins:
programmer id = "pi_1"; desc = "Use the Linux sysfs interface to bitbang GPIO lines"; type = "linuxgpio"; reset = 17; sck = 24; mosi = 23; miso = 18; ; - Save and close: press ctrl-x, ctrl-s, ctrl-x, ctrl-c
The bootloader binary
Actually finding the bootloader binary proved difficult. Most tutorials mention using the Arduino IDE, setting the board the sanguino and then flashing it directly. Recent versions of Arduino don’t include the sanguino board configurations by default.
There are work arounds, but I’ve already setup avrdude to do the actual flashing and I just need the binary file. Multiple guides mention this too: just use the Arduino IDE to download the files for them and then copy them elsewhere. I don’t need the IDE for anything else, so no need to install it.
Instead, just download the binary bootloader directly from the git repository directly to the Raspberry Pi:
wget https://raw.githubusercontent.com/Lauszus/Sanguino/master/bootloaders/optiboot/optiboot_atmega1284p.hexRaspberry Pi GPIO connection
This part is a bit of a pain. Getting to the board on the Ender 3 Pro isn’t as easy as most of the guides online state: ‘just remove 3 screws!’
No. That worked for the Ender 3, but because many users complained that the boards cooling fan was in a perfect place to have filament dropped into it, Creality flipped the entire board enclosure upside down on the Ender 3 Pro.
This means that to get at the board, you have to turn the entire printer over onto its side, take out the 3 screws on the bottom of the enclosure and a fourth screw on top, closest to the Y sled rail. It’s obviously best to turn the printer off and unplug it before doing so.
Now that the board is accessible, the Raspberry Pi can be connected. First, locate the SPI pins on the printer board, it’s between the screen connector and the USB port:
* - SPI pins
W - white connectors
G - green connectors
B - black screen connector
U - USB port

+------------------------------------------+
|   W W W W W W W W W W W W   G G G G G G
| BB
| BB
| BB
| BB
| BB
| **
| **
| **
| **
|
|
| UUU
| UUU
|
And, get familar with the GPIO pins on the Raspbery Pi.
Make the following connections:
- GND to any of the GPIO Ground Pins
- Reset to GPIO17
- MISO to GPIO18
- MOSI to GPIO 23
- SCK to GPIO 24
- VCC to any 3.3v pin
Printer connections

              ++
              ++
(display port)++
              ++
              ++

(ground) GND  OO Reset (GPIO17)
(GPIO23) MOSI OO SCK   (GPIO24)
(3.3V)   VCC  OO MISO  (GPIO18)

GPIO connections

(VCC)     3.3v OO
               OO
               OO ground (GND)
               OO
               OO
(Reset) GPIO17 OO GPIO18 (MISO)
               OO
               OO GPIO23 (MOSI)
               OO GPIO24 (SCK)
               OO
               OO
               OO
               OO
               OO
               OO
               OO
               OO
               OO
               OO
               OO
Note: I accidently connected VCC to 5v instead of 3.3v. Everything worked OK, but I later found that the Raspberry Pi had reported an undervoltage at some point during the process.
With the connections made and the Raspberry Pi powered up, the printer board should be getting power too. The blue LED on the board should be on, and the LCD panel should also be on. The fans won’t be spinning, but that’s OK.
At this point, test to make sure the GPIO connections are done properly:
sudo avrdude -p atmega1284p -C ~/avrdude_gpio.conf -c pi_1 -vIf it doesn’t error out and it says ‘deviced initialized’ towards the end then everything is good. If not, make sure that MISO and MOSI aren’t swapped.
Flashing the Bootloader
At this point the hard part is over, just flash the bootloader (run in the folder containing the bootloader binary):
sudo avrdude -p atmega1284p -C ~/avrdude_gpio.conf -c pi_1 -v -U flash:w:optiboot_atmega1284p.hex:iOnce that’s completed without error, the bootloader has been flashed and it won’t need to be done again!
But, at this point, turning the printer on will only result in a blank screen. The firmware was erased when the bootloader was flashed.
Compiling Marlin
There are a few options for firmware, but I decided to use vanilla Marlin. Some posts and guides I’ve seen would indicate that my 1.1.4 board isn’t compatible with the new 2.x version of Marlin, but the readme for the Marlin project does clearly state 2.0 supports both 32bit boards (the ‘new’ 4.2.x board) and 8bit boards (like my 1.1.4).
Getting the Sources
Just get the latest release. You’ll also need the configuration files linked here.
Unzip the sources and the configuration files to separate folders. In the configuration folder, go to config/examples/Creality/Ender-3 Pro/ (_not_Ender-3 Pro v1.5 - that’s for the 4.2.x board) and copy all of the files there to the Marlin folder of the sources. This will overwrite a couple of files.
VSCode and PlatformIO
Again, many of the guides online suggest using Arduino IDE. This is probably convenient if you are connected directly to the printer, but again, I have the Raspberry Pi setup to flash the firmware.
I also had issues compiling Marlin with Arduino IDE. I found the VSCode and PlatformIO approach to be easier, even if not as well known or documented.
It does require some setup:
- Install Visual Studio Code and open it
- Install the PlatformIO IDE extension
- Click on the extensions button on the left side bar
- Search for ‘PlatformIO IDE’ and select it
- Click Install
- Open the Marlin project
- Click the PlatformIO button on the left side bar
- In the tree view select Quick Access -> PIO Home -> Open
- In the window that opens, click ‘Open Project’
- Select the root source folder (it should contain a file named platformio.ini)
Configuring Marlin
Now you can go back to the explorer pane (top button on left side bar) and open up platformio.ini and make the following change:
- Under [platformio], change
default_envsto ‘sanguino1284p’.
Next, open Marlin/Configuration.h and:
- Change the value defined in
#define STRING_CONFIG_H_AUTHORto something unique:#define STRING_CONFIG_H_AUTHOR "(Taylor Talkington, Ender-3 Pro)" - Change the baudrate (the Ender 3 Pro can handle 250000):
#define BAUDRATE 250000 - Enable PID bed heating: uncomment
#define PIDTEMPBED
Next, open Configuration_adv.h and:
- Enable setting the progress bar over USB (ie. from OctoPrint) using the M73 command. Uncomment
#define LCD_SET_PROGRESS_MANUALLY - Enable the M73 command to also set the remaining time: uncomment
#definte USE_M73_REMAINING_TIME
This is the point at which any other configuration changes should be made.
Update 2020-09-20: I ended up trying out a few more configuration changes:
Configuration.h
- Set the ESteps to 96 since I calibrated it to that value:
#define DEFAULT_AXIS_STEPS_PER_UNIT { 80, 80, 400, 96 }
Configuration_adv.h
- Show current X/Y with a decimal value on the LCD:
#define LCD_DECIMAL_SMALL_XY - Show remaining time on LCD and (needed for the
USE_M73_REMAINING_TIMEabove) and cycle between that, elapsed time and % done:#define SHOW_REMAINING_TIME #define ROTATE_PROGRESS_DISPLAY
Build Marlin
Build by selecting Terminal->Run Build Task.
I got an error the first few times:

This is because the 8bit boards have a fairly limited amount of storage space for the firmware: 124Kb! Each feature and instruction supported takes up more room, and I enabled a few extras in mine. I have to disable something to make room.
Some people disable the boot screens to save space, but I’m not quite that desparate, I just need a bit. According to a few guides I’ve read, ARC_SUPPORT isn’t something that 3D printers normally use, so I disabled that by commenting out #define ARC_SUPPORT in Configuration_adv.h.
Build again and success! It’s close, but it’s just small enough:

Flashing the Firmware
Finally, time to flash the firmware. Connect the printer to the Raspberry Pi using the USB cable and turn the printer on. If this is the first time flashing firmware since installing the bootloader, the screen will just be blank. That is OK.
Now, to find the compiled firmware binary. Look at the last few lines of the build output, something like:
Linking .pio\build\sanguino1284p\firmware.elf
Checking size .pio\build\sanguino1284p\firmware.elf
Building .pio\build\sanguino1284p\firmware.hex
Advanced Memory Usage is available via "PlatformIO Home > Project Inspect"
RAM:   [===       ]  28.0% (used 4580 bytes from 16384 bytes)
Flash: [==========]  98.3% (used 124878 bytes from 126976 bytes)
Copy the file mentioned in the line that starts with ‘Building’ (the filename should be firmware.hex) to the Raspberry Pi. I used the VNC viewer’s file transfer function.
Then, run avrdude again, in the folder containing the firmware.hex file:
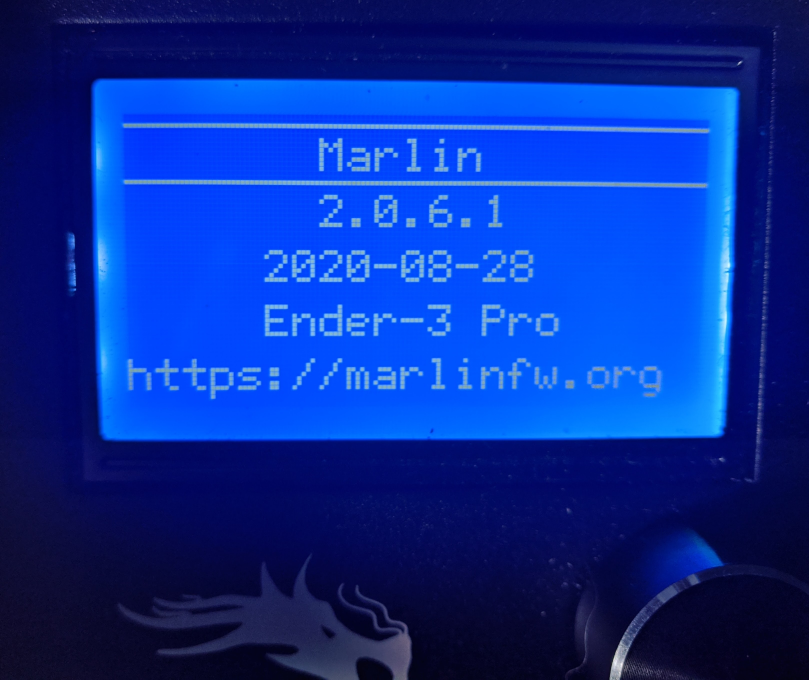
sudo avrdude -p atmega1284p -c arduino -P /dev/ttyUSB0 -b 115200 -U flash:w:firmware.hex:iThis takes a bit longer than the bootloader, so be patient. When complete, the printer should boot up, first showing the Ender Dragon, then the Marlin screen and finally the main screen:
Success!
note: it should also be possible to use the OctoPrint Firmware Updater plugin to flash the firmware directly from OctoPrint.
The Firmware Updater plugin works well, it just needs the following options:
| Setting | Value |
|---|---|
| Flash method | avrdude (Atmel AVR Family) |
| AVR MCU | Atmega1284p |
| Path to avrdude | /usr/bin/avrdude |
| AVR Programmer Type | arduino |
When using the Firmware Updater plugin, disconnect OctoPrint from the printer first!