Adding Hardware Buttons to Control OctoPrint
The saga of getting my Raspberry Pi 4B running OctoPrint and other things smoothly continues…
At this point I’ve decided to use the touch screen on my other RPi, so the RPi4 that runs OctoPrint is now headless. This has seemed to help the WiFi issues and I’ve gotten it working nicely after trying USB cables…but this also means that canceling a print can’t be done while standing at the printer.
My solution:
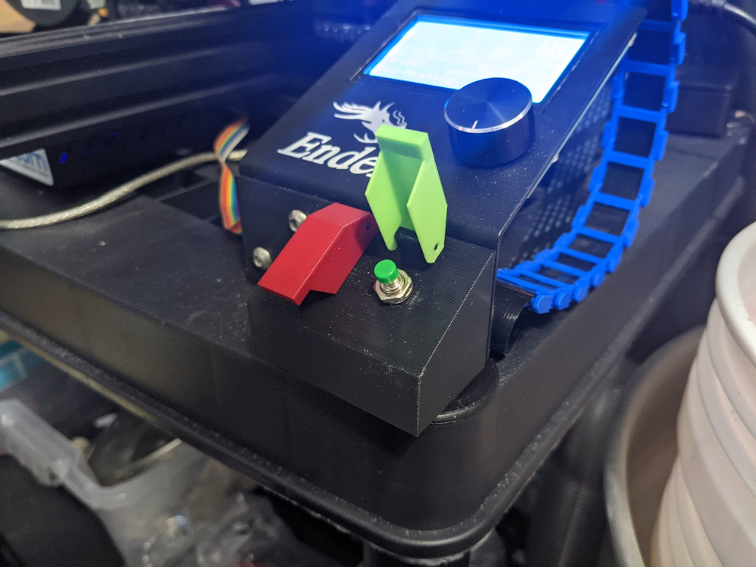 Physical buttons…with a 3d printed mount and covers, of course.
Now I have a button to cancel the currently running print (red) and reset the wifi (green).
Wiring
The buttons are simple to wire. This setup uses 3 wires for the 2 buttons. One wire from a ground pin to both buttons, and then one wire each from a GPIO pin (GPIO 20 & 21) and each button.
A simple OctoPrint plugin
Update 2021-01-18: I was having issues with the buttons being triggered erroneously while using the RPi.GPIO Python module..after some research I switched to gpiozero, which still uses RPi.GPIO but adds some additional functionality on top of it. The code is updated below.
I found the simplest way monitor the GPIO state and control OctoPrint was from an OctoPrint plugin written in Python. There are a couple of plugins that include support for physical buttons, but they also have a ton of features and overhead that I don’t need or want.
So, I wrote a very simple one that sets up the GPIO pins with software pull-up resistors, adds callbacks for when the buttons are held:
from __future__ import absolute_import, unicode_literals

import subprocess
import gpiozero

import octoprint.plugin

class HWButtonsPlugin(octoprint.plugin.SettingsPlugin):
    def __init__(self):
        super().__init__()
        self.cancel = gpiozero.Button(21, pull_up=True, hold_time=1)
        self.wifi = gpiozero.Button(20, pull_up=True, hold_time=1)

        self.cancel.when_held = self.on_cancel_held
        self.wifi.when_held = self.on_wifi_held

    def __del__(self):
        self.cancel.close()
        self.wifi.close()

    def on_wifi_held(self):
        self._logger.info("Resetting wifi-module. (Hardware button pressed)")
        subprocess.call("/home/taylor/reset_wifi.sh", shell=True)

    def on_cancel_held(self):
        if self._printer.is_operational() and self._printer.is_printing() and not self._printer.is_cancelling():
            self._logger.info("Cancelling print. (Hardware button pressed)")
            self._printer.cancel_print()


__plugin_name__ = "Hardware Buttons"
__plugin_version__ = "1.0.0"
__plugin_description__ = "Actions for hardware buttons wired to RPi GPIO pins."
__plugin_pythoncompat__ = ">=2.7,<4"
__plugin_implementation__ = HWButtonsPlugin()
Some details:
- Subclassing
octoprint.plugin.SettingsPluginis not used at this point. I plan on making the plugin configuratable at some point… - All of the
__plugin_*variables are how OctoPrint reads and loads the plugin
Installing the plugin is simple: place the python file in ~/.ocotprint/plugins and restart OctoPrint.
Reset Wifi Script
This is my reset wifi script:
#!/bin/bash
sudo modprobe -r brcmfmac
sleep 1s
sudo modprobe brcmfmac
sleep 1s
sudo iwconfig wlan0 power off